Friday 21 June 2013

Brand new foundations and blushers from Rimmel!

Hello readers!
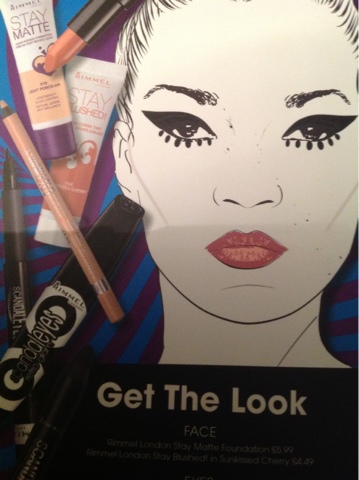
Sorry this post is a little late but I have an exclusive for you! As you know I went to Rimmel London presentation, were I not only got shown a brand new product that isn't even out yet, I also got given some in my goody bag to take home! What is this product I hear you ask, well these product are firstly a Stay Matte foundation, and also a Stay Blushed liquid blusher! And this is what they look like in the packaging:
And this is what the product looks like on the skin:
Personally I love them both, and I will explain why separately...
Firstly the foundation, I have oily/combination skin, so finding a foundation that has good coverage, but most importantly won't make my face look shiny and can control my shine is really important to me when finding a good foundation, and this product does exactly what it says on the packaging! "Feather-light, liquid mousse blends flawlessly for natural-looking, all day shine control. Silky smooth formula leaves a perfectly matte, baby-soft finish. Lightweight texture won't feel heavy or greasy." Although to be honest when first being told about the product I thought it was going to be similar to Maybellines dream matte mousse, remembering this from my youth as being highly thick that cakes your skin. However this foundation is completely different, as it doesn't sit heavy on the skin, and does indeed last all day, not to mention that it smells lush! 
Secondly, the other new product I received was the Stay Blushed, mine in the  colour 004, sun kissed cherry. To be honest I am more of a bronzer type of girl, and I can never find a blusher that complements my skin tone. However, after trying this product out, I feel as though it leaves a natural glow, and I can put on a small amount for a subtle rosy cheek, or I can layer the product for a more dramatic and bolder look. Also it's light weight and liquid, this blush blends seamlessly and instantly into the skin, applying with my fingertips for a natural flush of colour, unlike some powder blushes which can really make you look rosy in the cheeks. Also another bonus with this product is that because it is liquid, the product doesn't budge and therefor lasts all day! This product also smells really nice.
However, these products have not come out onto shop shelfs yet, with the products being available in late August in Superdrugs, and then early September in Boots, so hopefully not too much longer!
Thank you for waiting for this post, many more will be coming today as I have a very long drive ahead, so blogging can keep me occupied for a long time on a long journey! 


Tuesday 18 June 2013

Rimmel London AW trends 2013

Hello fellow beauty lovers!
So today I was asked to go to a Rimmel London trend report AW 2013, with makeup artist Kirsten Piggott, rimmel Londons official makeup artist, and Adam Slee, rimmel London's nail expert, where they both spoke about up coming trends for this years autumn and winter.
The first makeup trend for the AW, is a graphic eye, inspired by the Anna Sui catwalk and the sixties. It's a strong black graphic flick upwards into the socket line and dots added along the lower lash line. With the drama of the eyeliner and with a sweep of mascara, there is no need for fake eyelashes! All this looks needs is a little blush and a nude lip!
The second makeup trend for AW is taken from Christian Dior, with a futuristic fifties look. This classic cat eye is made with silver eyeshadow, with the lips made to appear smaller with faded lips in a beautiful deep fuchsia stain, using two different tones of red to make a just bitten look. Keep eyebrows natural, and not to bold, as you don't want them to distract away from silver liner.
The last makeup look, and personally my favourite, is inspired from Louis Vuitton and the femme fatales, beautiful Hitchcock women and decadent glamour. There is bold eyebrow and extravagant chocolate eye with a bold black flick that connects with the lower lash line. This is also worn with a red/ plum lip, all worn with a fresh complexion. I love this look as it is simple, but almost has a classic, yet vampy gothic look.


The second part of this presentation was with Adam Slee, when he talked through the AW 2013 nail trends, the first nail look for autumn that Adam spoke about inspired from Gareth Pugh, following on from last seasons black and red nails with another strong nail look, this is achieved by using an Ombré technique using a white shade, a navy blue and then an almost purple grey right at the base of the nail, creating a graduated, Ombré effect. 
The second look was taken from Chanel, it's a simple yet effective look of opting for bright nails, bucking traditional winter trends. At Chanel, the look was grunge, so having the bright nails, in a soft coral pink, created a feline edge and contrast. On top of this they then applied a glossy top coat.
The last nail look was inspired by Kenzo, this look was darker, traditional winter nail. A twist of colour was achieved by applying a darker pigment on the outside edge of the nails. This gave the illusion of a thinner, longer nail, and using traditional autumn winter colours like dark greens, blues and purples, instead of lighter colours like white and pinks.
This is a summary of what happened today, although I will be reviewing different products that I received in my goody bag, including some exclusives over the next week! So make sure you come back tomorrow to find out what they are!!
Samara xoxo

Monday 17 June 2013

Rimmel presentation

Hello readers! 
Tomorrow I am off to a Rimmel London presentation in London! I will be receiving all the latest trends for AW 13 and will be getting a goody bag! So hopefully whilst commuting home I will be showing you all the latest trends and also what items I picked up!! So make sure you log on tomorrow to see what trends will be coming your way soon!!
Samara xoxo   

Makeup, cut crease

Hello bloggers!
So I decided to try out a cut crease makeup look using various different makeup products, so I thought I would do a step by sep guide to how I achieved this look:
1) Eyebrows; fill in you eyebrows however you like to, personally I think this look looks best with a full on brow, so I use the rimmel London eyebrow pencil in number 001 all over my brows and then using a eyebrow brush to evenly distribute the product, then I like to go over the pencil with some matte brown eyeshadow and an angled brush, so I can lengthen and soften my eyebrows, after apply eyeshadow I like to brush back over them again, maybe using a clear mascara or a brow gel to set my brows into place. On this occasion I also use a black gel liner and a fine brush to draw a line under my brows to define and lengthen my brows, then using the angled brush I used for the eyeshadow, went over this line to soften it a little. Then using a concealer brush and concealer I 'carved' out my brows by neatening and removing any fall out from the powder, to finish I took a little white eyeshadow under my brows to highlight. 
2) Crease; to cut your crease you first start of with an eyeliner pencil, I used a matte brown pencil and you draw a line above your natural eyes crease, so that when your eyes are both open and shut you can see the cut crease line. Then using a small eyeshadow brush and using a matte brown, I buffed the pencil upwards toward the brow, I then added darker colours like purple and then black after, applying little and often and blending, until I got the desired strength of colour and depth. I then took a little gel liner and ran this along the cut crease line to have a crisper, sharper and more defined line.
3) Eyelid; using a concealer and a primer I cleared up any dropped down eyeshadow and after I applied a white eyeshadow so there was contrast between the line. You could glitter after if you want to, I used an illamasqua pigment after for glitter, but this step isn't necessary.
4) Eyeliner; taking a black gel liner and running a smooth black line on both the top and bottom of the eyelid with an exaggerated flick so that the flick ties in with the cut crease almost making a 'v' shape that's coloured in white, I then took the liner in the corner of my eye slightly pointing it and also on the inside of my water line. I then applied false lashes and mascara.
I hope this was helpful, and you can also use different colours and also glitter if you wish to make this look either more wearable or more daring! 
I really like this look, especially for an evening look, e.g. A club!
Let me know what you think! Would you brave it? 
Samara xoxo

Sunday 16 June 2013

MUA Lip Liners from Superdrugs

When I first went into Superdrugs I was just browsing when I came across the MUA collection. I saw these lip liners retailing for £1 each and if I'm being honest I didn't expect much from the pencils, but I purchased them anyway as I thought that for the sake of £2 I wasn't to bothered if they weren't any good, especially as they where only £1 each...
How wrong I was! I am totally in love with these lip liners! I have to admit that out of the two colours I do prefer Brooding Plum, which is almost a burnt red and seems to suite my pale completion perfectly, unlike red drama, which has a slight orange undertone. They where so easy to apply, and they weren't dry and they didn't drag across my lips, nor did they feel chalky or make my lips stick together like some other brands of lip liners can do. Another bonus is that the lids are sharpeners, which was great as I always lose my sharpeners and having one on the end of the pencil is a real life saver! I would defiantly recommend anyone to buy this lip liner, as I have not only worn it under lipstick as a base, but I have been wearing them without anything on top for a more low key matte finish look, perfect with a classic black flick and a sweep of mascara for a non effort everyday look! 
Please leave a comment saying how you find the product, and also any other shades that are particularly nice and would recommend! 
Samara xoxo 

Simple kind to eyes, makeup remover

When I first picked up this product, it being simple I assumed that it would be kind to my eyes, and usually I find that simple products are kind to the skin and seem to suite me really well, however I was sadly disappointed...
To start with, this product didn't remove all of my makeup, which then meant I had to use another product. Also, it made my eyes feels really dry and they felt like they were stinging, which I thought ironic given the name 'kind to eyes'. The only good thing I can say about this product is that it didn't irritate the rest of my skin when removing makeup, and it was usable, however I don't think I will be buying this product again!
Let me know what you think to this product in the comment box below!
Samara xoxo

Hello!

First post on my new blog!! Woohoo! I have been meaning to make a blog for a looonnggggg time now, I just never had the time or confidence to ever get round to making one, but finally here I am! This blog is nothing serious, just a place where I can express my views and opinions on various different make up and beauty items when I have some spare time on my hands! My main passion is makeup, and it is something I have always been very passionate about for a long time now, and hopefully something I would like to be involved in when I'm older with the aim of having a career in makeup artistry! The thought behind the blogs name, samara knows her slap is something that I thought was fun and quirky, with the name of slap referring to makeup (it's slang!) and not a physical slap!!!! Anywho, I hope you enjoy this blog when it gets more up and coming, with hopefully lots and lots of posts yet to come!! 
From Samara xoxo